Menu Planning Central

Making Life Easier Since 2007!

  • Home
  • About
    • Lifetime Member Update
  • Menus
    • Current Family Favorites Recipes
    • Family Favorites – Free Week
    • Family Favorites Menu Plan
    • Healthy 30 Minute Meals – Free Week
  • Recipes
  • Contact
  • Login
    • Affiliates
  • Cart

Easy Cheesy Garlic Bread

Spread the love
    29    

This easy, cheesy garlic bread is the perfect accompaniment to hearty pasta dishes, such as lasagna, spaghetti and meatballs, or rigatoni with chunky meat sauce. It is also a great appetizer on its own when served with a spicy marina sauce for dipping.  We’ve paired it with our Slow Cooker Ravioli Pasta Bake in our December Family Friendly Menu Plan.

If you can’t find shredded Gruyere, you can use the more traditional (and easier to find) shredded mozzarella instead.

Ingredients:

  • 1 loaf ciabatta bread
  • ¼ c. butter, unsalted
  • 4 gloves garlic, finely minced
  • 3 T. extra virgin olive oil
  • 2 T. oregano, dried
  • Parmesan cheese, freshly grated
  • 6 oz. shredded Gruyere cheese
  • salt and pepper, to taste


Directions:

Preheat oven to 350 degrees.

Cut ciabatta loaf in half lengthwise and arrange on a rimmed baking sheet lined with parchment paper. 

In a small saucepan, melt the unsalted butter over medium heat. Add the garlic and cook for 2-3 minutes, until the garlic is soft. Remove from heat.

In a small glass bowl, combine melted butter, garlic, olive oil, and oregano. Stir to combine thoroughly. Brush each half of the ciabatta bread with the olive oil mixture; making sure the entire surface is covered.

Grate Parmesan cheese over the surface of both bread halves and top with shredded Gruyere cheese. Sprinkle each half with salt and pepper, to taste.

Place in oven and bake for approximately 8-10 minutes or until cheese is completely melted and starting to brown on top. Remove from oven and allow to cool slightly before serving.

 

print this recipe

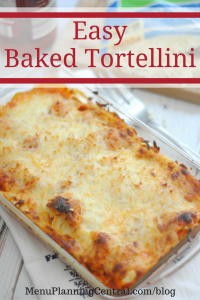
Easy Baked Tortellini

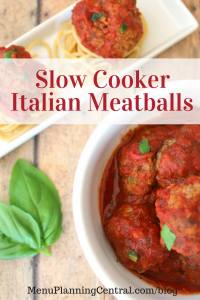
Slow Cooker Italian Meatballs

Ancho Chicken Quesadillas

Spread the love
    18    

Ancho Chicken Quesadillas

You can always count on store bought rotisserie chicken for a fast and easy weeknight meal, but that doesn’t mean it needs to be boring! This recipe can be on the table in about 20 minutes, plus it packs a lot of flavor into each bite.  We’ve paired this with our Authentic Mexican Rice in December’s Family Favorites Menu Plan.  

Ingredients

  • 12 oz. shredded rotisserie chicken
  • 1 T. ancho chili powder
  • 2 cloves garlic, finely minced
  • 2 T. fresh lime juice
  • 1 tsp ground cumin
  • 2 T. extra virgin olive oil
  • 1 tsp red pepper flakes
  • 1 tsp salt
  • 1 tsp black pepper
  • 4 extra large flour tortillas (or 8 smaller ones)
  • 12 oz. shredded Mexican cheese mix (can substitute with a mixture of cheddar and Monterey Jack), plus a little extra for garnish, if desired.
  • 2 T. fresh cilantro, stems removed and coarsely chopped.
  • 1 T. fresh cilantro, stems removed and coarsely chopped, for garnish

Directions

Place shredded rotisserie chicken in a medium glass bowl. Combine chili powder, garlic, lime juice, cumin, olive oil, red pepper flakes, salt and pepper in a separate bowl, then pour over shredded chicken. Toss to coat thoroughly.

Heat a 12″ non-stick skillet over medium heat and add one tortilla. For extra large tortillas, place 1/4 of the seasoned chicken on one side (for smaller tortillas, cover the entire surface). Layer 3 oz. of shredded cheese on top and 1/2 T. of chopped fresh cilantro. Fold over remaining side of tortilla (or place a second smaller one on top) and gently flip over once the bottom tortilla is nicely browned.

Gently press on top of tortilla after flipped for better contact with pan and to help melt the cheese inside. Continue cooking until second side is browned, as well.

Remove from pan and cover to keep warm while repeating the process the remaining ingredients. To serve, top each warm tortilla with a little shredded cheese and fresh cilantro. Delicious with salsa and guacamole, if desired.
print this recipe

How to Make Authentic Mexican Rice

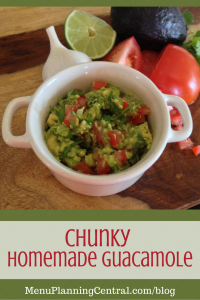
Chunky Homemade Guacamole

Authentic Mexican Rice

Spread the love
    33    

How to Make Authentic Mexican Rice

If you want to have the perfect side dish to go with your tacos, enchiladas, and burritos, you can’t go wrong with Mexican rice!  The secret to getting making and fluffy Mexican rice that doesn’t stick together is to thoroughly rinse the uncooked rice under cold water for a couple minutes to remove the excess starch.  Here’s how it’s done:

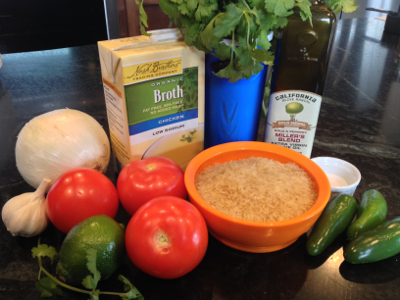
all_ingredients

Ingredients:

  • 3 or 4 medium ripe tomatoes, seeded and roughly chopped
  • 1 medium onion, roughly chopped
  • 3 or 4 cloves garlic, peeled
  • 2 jalapeno peppers, seeded
  • ¼ cup extra virgin olive oil
  • 2 cups long-grain white rice, thoroughly rinsed
  • 2 cups organic chicken broth
  • Fresh cilantro, stems removed and finely chopped
  • Salt and pepper, to taste
  • 2 limes, cut into wedges

Directions:

Preheat oven to 350 degrees.

Roughly chop tomatoes, onion, garlic and jalapeños and add to blender or food processor. Process thoroughly until mixture is smooth.

In a large oven-safe skillet with a tight-fitting lid, heat olive oil over medium heat. Once hot, add rinsed rice and stir constantly with wooden spoon for 5 or 6 minutes or until it starts to turn brown.

add_rice
Heat that rice!

Add broth and pureed tomato mixture to pan. Stir until thoroughly combined with rice. Bring to a boil while stirring occasionally, and then remove from heat.

stovetop
Here’s what it looks like on the stove top.
ready_for_oven
Rice is ready for the oven!

Cover skillet with lid and place in pre-heated oven on middle shelf.

After 15 minutes, remove lid and carefully stir contents of pan. Cook another 15 minutes or until all excess moisture in pan has been absorbed.

Remove from oven and stir in fresh cilantro. Season with salt and pepper, to taste. Serve with wedges of fresh lime to help “brighten” the taste.  Ole! 


One-Skillet White Bean and Spicy Sausage Soup

Spread the love
    24    

One Skillet White Bean and Spicy Sausage Soup


This soup is really delicious and it can be made in a single skillet for easy clean up. It freezes well so you can make larger batches for even easier weekday meals.  This recipe is included in November’s Family Favorites Menu Plan.  You can check out our menu plans here.

Ingredients:

  • 3 T. olive oil
  • 2 stalks celery, cleaned and finely chopped
  • 2 large carrots, peeled and finely chopped
  • 1 small white onion, finely chopped
  • 3 cloves garlic, peeled and finely chopped
  • 1 pound bulk spicy pork sausage, crumbled
  • 3 c. chicken or vegetable stock
  • 2 t. oregano, dried
  • 2 t. rosemary, dried
  • 1 t. crushed red pepper flakes
  • 2 cans (15 oz.) cannellini beans, drained and rinsed
  • 1 can (15 oz.) cannellini beans, pureed with liquid from can
  • 3 large kale leaves, tough stems removed and cut into bite-sized pieces
  • Salt and pepper, to taste
  • Garnish
    ¼ c. fresh parsley, chopped
  • Parmesan cheese, shaved


Directions:

In a heavy bottomed pan, heat olive oil over medium-high heat. Add celery, carrots, onions, and garlic to pan and sauté until tender.

Add crumbled bulk pork sausage to skillet and cook until no longer pink inside. Carefully drain excess fat from the pan before adding chicken or vegetable stock. Bring to a boil, and then reduce heat to medium-low. Add oregano, rosemary and crushed red pepper flakes.

Add whole and pureed white beans to skillet. Cover and simmer for 20-25 minutes, stirring occasionally. Add kale and simmer another 15-20 minutes. If soup is too thick, add more stock to thin. If it is too thin, continue cooking until desired consistency is reached.

Garnish with chopped fresh parsley and shaved Parmesan cheese and serve with crusty Italian bread.

print this recipe

One-Pot Beer Cheese Soup

Spread the love
         

One Pot Beer Cheese Soup

Beer cheese soup makes for a warm and satisfying meal on cold, blustery days. Unfortunately, it has a reputation for being a bit tricky to make because it can turn into a gloppy mess if you aren’t careful. However, you can achieve picture-perfect (and palate-worthy) results at home with this easy recipe.

This recipe is included in November’s Family Favorites Menu Plan.  Click here to learn how to get yours!

Tip: Take a “low and slow” approach while preparing this recipe. Most importantly, don’t allow the soup to boil after adding the cheese because it will cause it to separate.

Ingredients:

  • 6 T. unsalted butter
  • 1 carrot, peeled and finely chopped
  • 1 stalk celery, finely chopped
  • 1 small yellow onion, finely chopped
  • 3 cloves garlic, minced
  • ¼ c. all-purpose flour
  • 3 c. organic chicken or vegetable broth
  • Salt and pepper, to taste
  • 1 c. heavy cream
  • 4 oz. goat cheese, cut into chunks and softened
  • 16 oz. sharp yellow cheddar cheese, grated, plus extra for serving
  • 2 t. Dijon mustard
  • 2 t. Worcestershire sauce
  • 8 oz. mild-flavored beer
  • ¼ c. chopped red onion, soaked in water (optional)


Directions:

Add unsalted butter to a Dutch oven or soup pot over medium heat. Once melted, add carrot, celery, onion and garlic and sauté until soft, about 8-10 minutes.

Add flour and stir until completely incorporated. Cook for approximately 2-3 minutes.

Stir in chicken stock and increase heat to medium-high. Bring to a boil, and then reduce heat to medium-low. Simmer uncovered for approximately 30-35 minutes, stirring occasionally. Season with salt and pepper, to taste.

Remove from heat and blend mixture with an immersion blender until smooth, if you have one. If not, transfer the liquid to a blender and blend until completely smooth. Work in batches if necessary.

Once smooth, return mixture to pot over medium-low heat. Add the heavy cream, goat cheese, and half the cheddar cheese. Stir continually until cheese is completely melted. Add the remaining cheddar cheese and stir until melted.

Add the mustard, Worcestershire sauce, and beer and stir until blended. If soup is too thick at this point, add a little additional chicken or vegetable stock. Continuing simmering on medium-low heat another 5-10 minutes, or until heated through.

Serve immediately with soft pretzel rolls or crusty bread of your choice. Garnish with shredded cheddar cheese, red onion, and/or popcorn.

print this recipe


  • « Previous Page
  • 1
  • …
  • 5
  • 6
  • 7
  • 8
  • 9
  • …
  • 16
  • Next Page »

Search this site…

Try Family Favorites Menu Plans for 7 Days - Free

Our Favorite Recipes

Quick & Easy Grilled Peach Salad

Quick & Easy Grilled Peach & Chicken Salad

Spread the love
    24    

Spread the love    24    This grilled peach salad featuring a classic homemade Champagne vinaigrette could be one of my all-time favorites.  It is bursting with flavor and is so easy to make.  It’s light and healthy ~ everyone at our house loves it! When I need something quick and delicious, this beautiful healthy salad comes to mind. […]

Gluten-Free Recipe Round-Up for Fall

Spread the love
         

Spread the love         I am SO excited today about everything Gluten-Free! So many Menu Planning Central members have asked for more help with their Gluten-Free life, and we are making it happen. As you probably know, there are a zillion awesome food bloggers and websites dedicated to helping folks with all things GF, and I have […]

Tuscan Braised Pork Roast

Mouth-Watering Tuscan Braised Pork Roast

Spread the love
    199    

Spread the love    199    Dust off that Dutch oven and get ready to be amazed at how tender and juicy an ordinary pork roast becomes when we let it slowly braise in this Tuscan-inspired marinade. Simmered low and slow your roast will literally be fall-apart tender and delicious. Tip: The longer your meat marinates the more flavorful […]

Learn more about our menus and recipes!

Spread the love
         

Spread the love         Have you ever wondered what kind of food is included in the menu plans? Today I listed off some of the recipes that are included in the November menu plans for you and explained more about our awesome Early Bird Black Friday Sale that’s going on NOW! Want to know EVERY recipe included […]

Make Entertaining Easier with a Slow Cooker

Spread the love
    1    

Spread the love    1    Affiliate links are used in this post. Do you enjoy entertaining? Use your slow cooker to help make a night of hosting friends and family in your home a lot easier. In fact, if you own multiple slow cookers or various kinds of slow cookers, then you may even be able to prepare […]

Summertime Family-Friendly Menu Plan

Spread the love
         

Spread the love          I’m SO, SO excited about our new Summertime menu plan!  I’ve been test driving these recipes with my family and we are now looking forward to dinner every night, because we keep discovering new favorites. This collection features 4 weeks of done-for-you menus and shopping lists that will save you so much […]

Planning Your Slow Cooker Meals

Spread the love
         

Spread the love         Affiliate links are used in this post. Do you know you’ll have a day this week when you’ll be running around all day? Do the kids have a full schedule of after-school activities that have you driving from one ball field to the next? That’s the perfect day to plan a slow cooker […]

10 Free Slow Cooker Recipe Books for Weight Loss

Spread the love
         

Spread the love         Affiliate links are used in this post.   Need to lose a few pounds?  Make it easier by harnessing the power of your slow cooker!  Today I’ve got ten terrific free Kindle books* that you can grab to help you get started.   *All of these books were available for Free when posted. […]

  • About
  • Contact
  • Member Login
  • Affiliates
  • Privacy & Disclosures
  • Terms

Copyright © 2025 · MenuPlanningCentral.com