Menu Planning Central

Making Life Easier Since 2007!

  • Home
  • About
    • Lifetime Member Update
  • Menus
    • Current Family Favorites Recipes
    • Family Favorites – Free Week
    • Family Favorites Menu Plan
    • Healthy 30 Minute Meals – Free Week
  • Recipes
  • Contact
  • Login
    • Affiliates
  • Cart

Hot & Melty Tomato, Basil, Mozzarella, & Pesto Sandwich

Spread the love
         

Affiliate links are used in this post.

Hot & Melty Tomato, Basil, Mozzarella, & Pesto Sandwich


Everybody loves a melty, soothing sandwich full of flavor!  This gorgeous sandwich can be made so easily and will quickly become one of your favorite ways to use your fresh tomatoes and basil from the garden or farmer’s market.

Hot & Melty Tomato, Basil, Mozzarella, & Pesto Sandwich


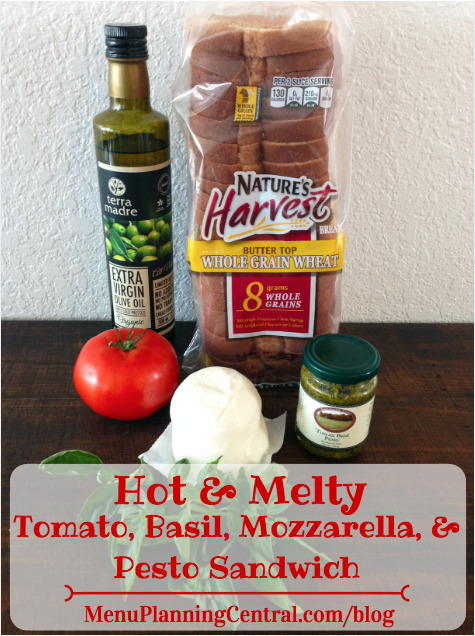
For one sandwich you will need:

  • 2 Slices sandwich bread of your choice
  • ¼ Fresh Mozzarella Ball (sliced)
  • 3 Slices of Large Tomato
  • Handful of Fresh Basil
  • 1 Tbsp. Basil Pesto
  • 1 Tbsp. Extra Virgin Olive Oil

Hot & Melty Tomato, Basil, Mozzarella, & Pesto Sandwich


Step 1:  Wash your vegetables and herbs.  Pat the basil dry.

Step 2:  Preheat a stovetop skillet on low.

Hot & Melty Tomato, Basil, Mozzarella, & Pesto Sandwich

Hot & Melty Tomato, Basil, Mozzarella, & Pesto Sandwich


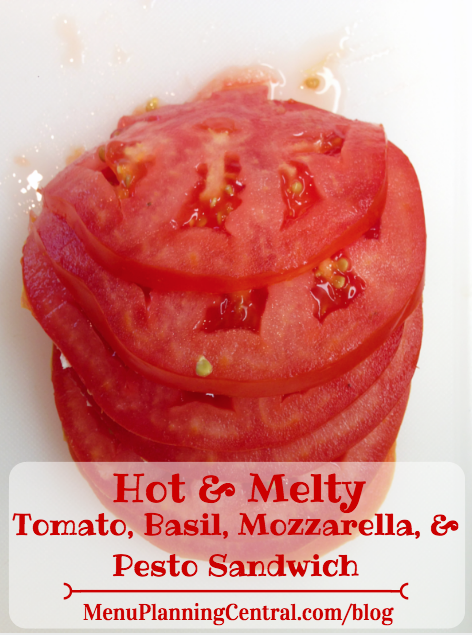
Step 3:  Slice tomato and mozzarella.

Hot & Melty Tomato, Basil, Mozzarella, & Pesto Sandwich


Step 4:  Add olive oil to skillet.

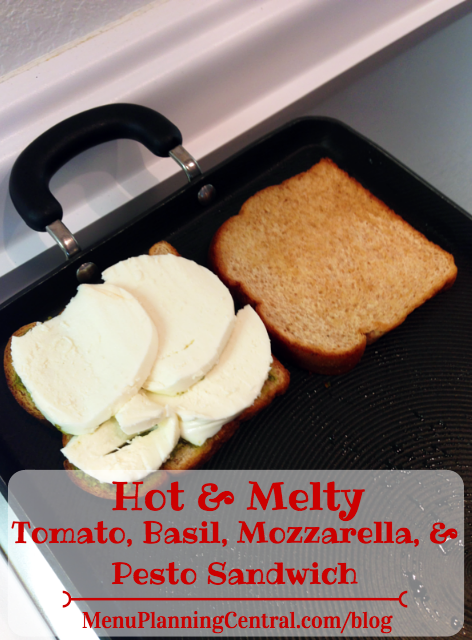
Step 5:  Place both pieces of bread on the skillet.  Add pesto, mozzarella, tomato, and basil to bottom slice.

Hot & Melty Tomato, Basil, Mozzarella, & Pesto Sandwich


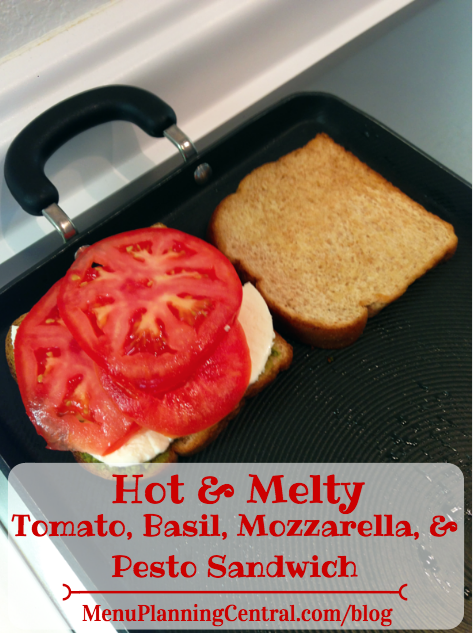
Step 6:  Add the top slice.

Step 7:  Use a cast iron sandwich press to flatten the sandwich on the skillet.

Hot & Melty Tomato, Basil, Mozzarella, & Pesto Sandwich


Step 8:  Cook approximately 4 minutes on each side, or until bread is crisp.

Step 9:  Remove from heat.  Serve immediately! YUM!

Hot & Melty Tomato, Basil, Mozzarella, & Pesto Sandwich


print this recipe

The Hot & Melty Tomato, Basil, Mozzarella, & Pesto Sandwich is included in our awesome Summertime Family-Friendly Menu Plan!  Check it out here.

Family-Friendly Summer Menu Plan graphic


Fried Chicken Sliders with Asiago Cheese & Ranch

Spread the love
    1    

Fried Chicken Sliders with Asiago & Ranch

Summer is here and it’s time for a delicious crowd-pleasin’ recipe!  These Fried Chicken Sliders with Asiago Cheese & Ranch will make your mouth water.  Let’s get cookin’!

Fried Chicken Sliders

with Asiago Cheese & Ranch Dressing

Prep: 15 minutes

Cook: 25 minutes

Total: 40 minutes

Servings: 4

You will need:

  • 1 large Organic Chicken Breast (cooked, or see Step 1)
  • ½ cup Bread Crumbs
  • ½ cup Half & Half
  • 1 Egg
  • 1 tsp. Dill
  • 1/3 of 48 oz. bottle Crisco Canola Oil
  • 1 thick slice of Tomato (cut into 4 equal pieces)
  • 1 cup Lettuce
  • 4 tbsp. Ranch Dressing
  • 4 thick slices Asiago Cheese (about 2” on each side)
  • 4 Mini Slider Buns


Fried Chicken Sliders with Asiago & Ranch

Step 1:  Boil 2 inches of water in a pan.  Add your chicken breast and cook on high until water is halfway evaporated.  Turn heat down to medium-low.  Brown and remove.  Let cool.  (This will take about 15 minutes)

Step 2:  Preheat your oven to 400 degrees.

Step 3:  Preheat your canola oil at medium heat in a pan on the stovetop.

Fried Chicken Sliders with Asiago & Ranch


Step 4:  Cut your cooked chicken breast into 12 random slices.  (You’ll need 3 pieces per slider)

Step 5:  Combine egg, half & half, and dill in small mixing bowl. Whisk.

Step 6:  Dip each fully cooked piece of chicken into the egg mixture, and on a separate plate, coat evenly with breadcrumbs.

Fried Chicken Sliders with Asiago & Ranch

Step 7:  Time to quick-fry your chicken!  Since it is already fully cooked, you are only needing to fry each piece for about 20 seconds.  Just add the breaded chicken chunks to the hot oil, remove after 20 seconds with slotted spoon, and place onto a paper towel on a plate.  Dab to remove excess oil.

Fried Chicken Sliders with Asiago & Ranch

Fried Chicken Sliders with Asiago & Ranch

Step 8:  Add Asiago cheese to each bun.  Crisp the buns and melt cheese in the oven for 4-5 minutes. Remove.  Get your lettuce and tomatoes ready.

Fried Chicken Sliders with Asiago & Ranch

Fried Chicken Sliders with Asiago & Ranch

Step 9:  Add 3 chicken pieces to each slider.  Add a quarter of a tomato slice, some lettuce, 1 tablespoon Ranch dressing, and an optional dash of dill to each slider.  Serve immediately!

Fried Chicken Sliders with Asiago & Ranch

Fried Chicken Sliders with Asiago & Ranch

Fried Chicken Sliders with Asiago & Ranch: Print the recipe!

Char-Broil TRU-Infrared Patio Bistro Gas Grill Review

Spread the love
         

Affiliate links are used in this post.

Grilling season is upon us, so today I thought I would share a product review of a handy grill that doesn’t take up much space, and you don’t even need to leave home to purchase!
This Char-Broil TRU-Infrared Patio Bistro Gas Grill is a great solution for small spaces!  (Product review)
The Char Broil Patio Bistro Infrared Gas Grill adds a little bit of technology to the standard gas grill. As you’ll see, this grill could be just the answer for some of the dilemmas that grillers sometimes face.

If you only have a small space in which to grill, this grill, or it’s even-more-compact sibling, could be what just you’re looking for. It has a small, compact design that allows you to stow it in small spaces and is perfect for folks that have a really small patio space or just don’t want to take up a ton of room with a larger grill.

If you live in an apartment, you might particularly enjoy the size of this grill. And even though it’s small in design, it functions like a standard size grill. You’ll have plenty of room to cook your favorite foods.  In fact, you can cook a meal for four with this grill.

The infrared feature is really interesting.  It’s referring to the actual grill surface.  There are very small openings in the stainless steel cooking surface that prevent the flames from actually touching the food. The cooking surface heats quickly and evenly, without the flames actually touching your food, so there are no hot/cold spots.  The radiant heat helps lock in moisture, keeping your food delicious and flavorful without drying it out.  Despite the flames not touching the food directly, you’ll still get that smoky grilled flavored that you know and love.
This Char-Broil TRU-Infrared Patio Bistro Gas Grill is a great solution for small spaces!  (Product review)This grill features two stainless steel cooking surfaces, so you’ve got space to move your more quick-cooking or delicate foods farther away from the heat.  The surfaces are easy to clean, too!  Give ’em a good coating of non-stick spray before you start cooking your meal and it’ll make it even simpler for you.

The parts are all high-quality and designed to make it through more than one grilling season. The grill does have an ignition that’s electronic making lighting an easy process. You’ll be able to light the grill quickly and be on your way to a delicious meal.

When you combine modern technology with a sleek, compact design you have a great grill for small spaces. You’ll enjoy the fast heating, even cooking, and simple cleanup of this grill.

You will need to assemble this grill, but that’s a one-time job.  After that you’re good to go for years of enjoyable cookouts.  

This compact Char-Broil TRU-Infrared Patio Bistro Gas Grill is a great solution for small spaces!  (Product review)If you’re in need of a tabletop or portable camping version of this grill, they’ve got that too!  Same great technology and design, just easy to tote and store in a 30 gallon Rubbermaid container, and cook right on top of your picnic table.  

They also offer electric versions of this grill and the full-sized grill as well.  If you need a compact, high quality grill, the Char-Broil TRU-Infrared Patio Bistro Gas Grill is a great choice for you.

Teach Your Kids How to Use Sharp Knives Safely!

Spread the love
         

Affiliate links are used in this post.
Teach your kids how to use knives safely. Free video training!

Do your children know the 4 safe ways to use a knife, and the 3 safe ways to hold food that you’re cutting?

When my six kids were little, I did a lot of letting then stir and pour ingredients into a bowl, snap the ends off of beans, and they helped garden, but I was not too keen on giving them sharp knives!  I would not have thought they could handle it safely, and would not have known smart ways to teach them.  So, I think this free video course is pretty cool!  You and your kids will learn from a mom of four how to safely hold food and cut it with sharp knives, which should springboard them into more meaningful and competent help in the kitchen.

They are also offering a cool cooking school for kids!  It’s called Kids Cook Real Food, and it’s a video course that you and your kiddos can go through and start learning the ropes in the kitchen.  My 13 year old son loves cooking shows and has learned so much from them.  I think he will love this class and having something special to work on in the evenings after his school work is done.  I know he feels a lot of pride when he can cook a delicious food for us.  Maybe your kids would like to give this a try to.  Start with the free knife skills class and see what you think.  🙂

Have you seen the #MyKidMadeThis Challenge? So fun!

Spread the love
         

Affiliate links are used in this post.
1200x628_facebook_ad_mykidmadethis (1)
You guys, THIS IS SO FUN!
I just learned about the #MyKidMadeThis Challenge yesterday, and it is only going on for a couple more days, but I wanted to tell you about it anyhow.

This event is hosted by Katie at Kitchen Stewardship, and the purpose is simply to get kids into the kitchen, starting to learn the ropes of food prep, or building on the skills they already have.

There is a HUGE prize package being given away, and this looks totally fun, so if you have kids in your home, I encourage you to jump in and get involved!
740x1102_mykidmadethis_challenge_pinnable

  • « Previous Page
  • 1
  • …
  • 10
  • 11
  • 12
  • 13
  • 14
  • …
  • 19
  • Next Page »

Search this site…

Try Family Favorites Menu Plans for 7 Days - Free

Our Favorite Recipes

Affordable Thai Chicken Thighs

Instant Pot Savory Thai Chicken Thighs

Spread the love
    131    

Spread the love    131    These savory Thai chicken thighs are perfect when you are looking for a quick and delicious dinner recipe.  This affordable Thai chicken thigh recipe is made in your Instant Pot®, which means you can serve this dish on this busy weeknights. (Using chicken thighs in this recipe keeps it affordable, moist and juicy). […]

Learn more about our menus and recipes!

Spread the love
         

Spread the love         Have you ever wondered what kind of food is included in the menu plans? Today I listed off some of the recipes that are included in the November menu plans for you and explained more about our awesome Early Bird Black Friday Sale that’s going on NOW! Want to know EVERY recipe included […]

Copycat Starbucks Hot Chocolate Recipe

Spread the love
    31    

Spread the love    31       Are you ready for hot cocoa season?!  Now you can enjoy your favorite Starbucks Hot Cocoa treat from the comfort of home, inexpensively!  Here’s what you need: 2 tablespoons of sugar 2 tablespoons unsweetened cocoa 2 tablespoons water ¼ cup water 1½ cup milk (any kind will do) ¼ teaspoon vanilla […]

Using Your Slow Cooker Year-Round

Spread the love
         

Spread the love         Affiliate links are used in this post. Once you start digging out your slow cooker and using it to cook delicious homemade meals, you will quickly become a fan. Many of us start to think about soups, stews, chilis, and all sorts of other delicious fare that lends itself to slow cooking (pot […]

One-Skillet White Bean and Spicy Sausage Soup

Spread the love
    24    

Spread the love    24       This soup is really delicious and it can be made in a single skillet for easy clean up. It freezes well so you can make larger batches for even easier weekday meals.  This recipe is included in November’s Family Favorites Menu Plan.  You can check out our menu plans here. Ingredients: […]

Easy Cheesy Garlic Bread

Spread the love
    29    

Spread the love    29     This easy, cheesy garlic bread is the perfect accompaniment to hearty pasta dishes, such as lasagna, spaghetti and meatballs, or rigatoni with chunky meat sauce. It is also a great appetizer on its own when served with a spicy marina sauce for dipping.  We’ve paired it with our Slow Cooker Ravioli Pasta […]

Family Friendly Recipes Week 3 Review

Spread the love
         

Spread the love         So last week I followed the February Family Friendly Week 3 plan and here’s what we thought: Ground Beef Stroganoff:  This was easy to make, but we felt it should have been saucier.  I will be fixing this recipe to reflect this. Mexican Meatloaf:  While we had the ground beef out for making […]

Slow Cooker Tropical Pork

Slow Cooker Tropical Spiced Pineapple Pork Roast

Spread the love
    5    

Spread the love    5    Tropical spiced pineapple pork butt made slow and easy in your slow cooker.  It’s a little sweet, a little savory, and a little spicy too.    We’ve taken fresh pineapple and spicy jalapeno and paired them with toasted sesame oil, creamy peanut butter, five-spice powder, and fresh cilantro for power-packed burst of flavor […]

  • About
  • Contact
  • Member Login
  • Affiliates
  • Privacy & Disclosures
  • Terms

Copyright © 2025 · MenuPlanningCentral.com